Wool Capes for 19th Century Reenacting
 |
| My winter ensemble |
This cape was a quick project before a winter living history gathering. It is made out of a coat-weight wool skirt that was already the size and shape that
I wanted, so I didn’t need to cut any pieces. First, I hemmed the front edges.
Next, I sewed darts on the top to fit the garment to my shoulders, and then I
sewed on a collar made out of a small rectangle of wool. Total time was only 30 minutes or so. The skirt and several others like it were given to me by a friend, so my total cost was
nothing. The cape is very warm and practical and makes a great layer over a
paletot for Civil War reenacting.
 |
| My cape |
Notice how the plaid does not match up at all in the front of my cape? When it was a skirt, it wasn't cut to line up. I knew this before I made the cape, but I really liked the colors. Oh well, it still looks good, just not great.
 |
| Frog closure |
Also, I made the collar on mine go all the way to the front edge of the cape so that the collar covered the entire raw edge of the neck opening. This design choice was convenient because it saved time while I was sewing the cape, which I was making at the last minute. You can also see how I sewed the two front edges of the cape on my sewing machine, something that is quick but looks a little less neat.
 |
| The second cape I made |
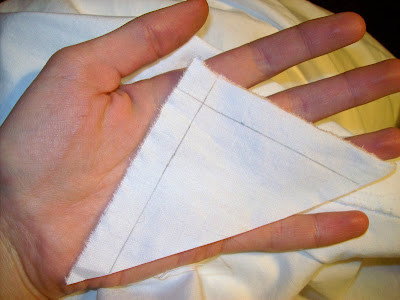
This month I made a similar cape for a friend. I still have some of the freebie wool skirts in my stash, so I used another one of those. I took my time making this one, and I think it looks a lot neater. The plaid lines match up in the front! First, I hand-sewed a 2-inch wide fold on each front edge. Then, I folded over and stitched in place the neckline corners to form a V-neck opening. I could have also cut off that triangular part and rolled the edge or faced it with a piece of tape. It was sort of a "oh, this works" moment. The collar is slightly off-center, but not enough to bother me. Hopefully my friend doesn't mind.
 |
| Front edge: 2" self-facing, buttonholes, neckline corner folded over |
The collar on this cape ends 2-3 inches from the front edge, allowing for a front opening overlap of 2 inches. I like the button closure much better than the frog closure on my first cape. It looks more put-together and less rushed. It also seems more secure. I got these gorgeous 24 karat gold plated shank buttons and many other pairs like them from PA Fabric Outlet in Lemoyne, PA (http://www.pafabric.com/). (I don't remember how much they cost, but maybe 20 cents), and I got several pairs because they had a great price.
 |
| Pretty buttons! |
 |
| The shoulder seam |
The skirt was a half-circle; below is a diagram of the way I laid out the fabric. The blue lines in this drawing show where I sewed shoulder seams. I trimmed the excess, pressed the seams to one side, and secured them with a hand-sewn running stitch (not quite a felled seam, since the raw edges are visible).
 |
| My cartoon drawing of the fabric layout |
This project was inspired by my need for warm clothes and what was feasible to make from old skirts. I did not research the historic accuracy of this design, as it is so simplistic. Any suggestions about how accurate it is or what could be done to make it more so? These capes are so easy and useful that I might make more in the future.


Stunning, I love the fabric choice, and you did a great job lining up the plaids! I can't wait to get to wear it! :)
ReplyDeleteAll my collars are slightly off center too. LOL.