A Cote for a Little Girl
 |
| Front view of cote |
I just finished a medieval cote for my goddaughter. Some aspects of the project did not go well, but it was fun to make and a great learning experience. I learned many years ago that it's important to always see the positive side of any of my craft projects because the failures always help me to do better next time. Some people stop pursuing a hobby because they become too discouraged. However, by trying and failing, and then accepting that failure, one advances one's skills and learns how to do better next time.
The cote is made out of a wool skirt, another one of the skirts that I rescued from a friend's garbage, like the 19th century wool capes that I made. It may be disagreeable that this cote came from something that was literally in a trash can, but I am very proud of how I make art from things that other people do not value. My anti-consumerism worldview encompasses making do with what I have instead of throwing things out and buying new things. The total cost of this cote was nothing.
I drew the pattern for this cote using Sarah Thursfield's "The Medieval Tailor's Assistant" as my guide. It's a very simple rectangular cut design. I took the non-historically accurate liberty of adding silk facing (also repurposed from old clothing!) to the neck and sleeves so that my goddaughter can feel something soft against her skin instead of the scratchy wool. At least the material is historically accurate, if not the method.
I spent about 10 hours making this cote--a very long time, but remember that it's a new experience for me and I made several mistakes which I took the time to correct. I hope that if I were to make another cote like this one, I could do it in fewer hours, perhaps 2 or 3. I can be very inefficient when I sew, especially when I'm doing it as a means of entertaining myself as opposed to accomplishing work. Plus, I did a lot of handsewing on this because it was easier than manipulating the tiny pieces through my sewing machine.
One of the problems with this cote is sloppy seams. The points where the skirt gores intersect are very sloppy. I felled all the seams, and therefore the gore intersections have six layers of fabric in one point. How can I make these seams less bulky? It looks terrible. Another problem is the fraying of this coat-weight wool. When I felled the seams, I folded only once because the fabric is so thick that it would be too bulky to fold them twice. Thus, the raw edges are fraying a lot. It will not weaken the garment because the stitches hold everything in place, but it looks very sloppy on the inside. What is a historically accurate method for preventing the frayed edges? Perhaps felting the wool?
At the completion of my project, I feel very pleased with the results. I encountered a lot of issues, but managed to resolve the important ones. I am so much more happy now that I enlarged the sleeves and am glad I took the time to do so. I learned a lot about making medieval clothing, though my methods are largely modern at this point. It was also a great foray into infant clothing, which I found both educational and enjoyable.
 |
| Back view |
Not only am I fairly new to medieval sewing, but also this is also my first venture into children's clothing. It's so hard to adjust to the tiny size! It matches all the measurements with room to spare, but since I'm sewing with wool and linen instead of stretch-knit cotton, I may not have factored in enough ease. I won't know until I give the clothes to my goddaughter in a couple weeks. I re-made the sleeves because though the first ones measured large enough, they were almost certainly too small because the fabric doesn't stretch like most infant clothing. The first sleeves had a circumference of 6", and the new ones are 8". The finished garment is approximately a size 24 or 2T (U.S. infant sizes).
 |
| Inside-out view, showing the silk facings |
The cote is made out of a wool skirt, another one of the skirts that I rescued from a friend's garbage, like the 19th century wool capes that I made. It may be disagreeable that this cote came from something that was literally in a trash can, but I am very proud of how I make art from things that other people do not value. My anti-consumerism worldview encompasses making do with what I have instead of throwing things out and buying new things. The total cost of this cote was nothing.
 |
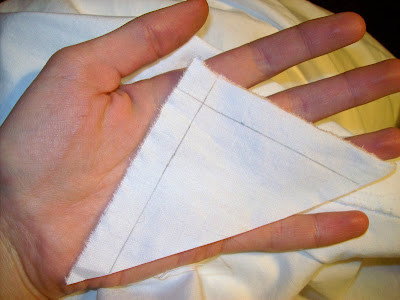
| Silk facing on the sleeve, hand-sewn with a running stitch |
I drew the pattern for this cote using Sarah Thursfield's "The Medieval Tailor's Assistant" as my guide. It's a very simple rectangular cut design. I took the non-historically accurate liberty of adding silk facing (also repurposed from old clothing!) to the neck and sleeves so that my goddaughter can feel something soft against her skin instead of the scratchy wool. At least the material is historically accurate, if not the method.
 |
| Tiny running stitches around the neckline hold the layers together. The hem of the facing is also hand-sewn with running stitches. |
I spent about 10 hours making this cote--a very long time, but remember that it's a new experience for me and I made several mistakes which I took the time to correct. I hope that if I were to make another cote like this one, I could do it in fewer hours, perhaps 2 or 3. I can be very inefficient when I sew, especially when I'm doing it as a means of entertaining myself as opposed to accomplishing work. Plus, I did a lot of handsewing on this because it was easier than manipulating the tiny pieces through my sewing machine.
 |
| Close-up of a sleeve and the under-arm gusset; there is a seam at the top and a seam at the bottom, since I had to enlarge the sleeves |
One of the problems with this cote is sloppy seams. The points where the skirt gores intersect are very sloppy. I felled all the seams, and therefore the gore intersections have six layers of fabric in one point. How can I make these seams less bulky? It looks terrible. Another problem is the fraying of this coat-weight wool. When I felled the seams, I folded only once because the fabric is so thick that it would be too bulky to fold them twice. Thus, the raw edges are fraying a lot. It will not weaken the garment because the stitches hold everything in place, but it looks very sloppy on the inside. What is a historically accurate method for preventing the frayed edges? Perhaps felting the wool?
 |
| This view shows the center and side gores and the frayed edges on the seams. The rolled hem is also visible (is a rolled hem a historically accurate method?). |
At the completion of my project, I feel very pleased with the results. I encountered a lot of issues, but managed to resolve the important ones. I am so much more happy now that I enlarged the sleeves and am glad I took the time to do so. I learned a lot about making medieval clothing, though my methods are largely modern at this point. It was also a great foray into infant clothing, which I found both educational and enjoyable.
 |
| This close-up view shows how I attatched the facings to the fashion fabric first, then turned and pressed the pieces, then stitched the shoulders together through the wool fabric right next to the facing seams. |


it's good for a first attempt -kids clothes are harder, I always think. and it's very period to make chicdrens things out of the scraps!
ReplyDelete