A Crocheted Wheel Cap

I made this cap sometime earlier this year, and finally have pictures to share! It's a copy of an original that is pictured in the Confederate Echoes of Glory. I designed the pattern myself, just by looking at the picture. I could see that the original was crocheted in back loop only, so I simply started crocheting in the round and increasing evenly to form a circle. I had to unravel a few times as I was experimenting. I'm really happy with this hat, though it looks a little big. Perhaps it could be crocheted with a smaller hook, or I could change the pattern so that I do one more decrease row before the hat band and thus the band would be tighter. I started doing that at first, but it looked too small. Here's the pattern that I wrote, which I am sharing openly with the caveat that anyone who shares the pattern or makes the hat acknowledges the original source. Personal use only, please; this hat may not be sold.
IMPORTANT NOTE: I just realized that all of these pictures, except the two of my friend wearing the cap, were taken before I enlarged the hat band. As you can see, the band is much wider now. The pictures of it on the white blanket show the original narrow band. At first, I had crocheted 10 rows and then turned it inside itself to make a double thickness and sewed it in place. The band was too narrow. I took it apart and added some rows to make it wider.


1860's Crocheted Wheel Cap
Pattern created by Kaela Jacobs www.fabricoftime.blogspot.com
Yarn: worsted 100% wool
Hook: U.S. size G
Self closing ring: ch 4
1: 2 sc in each ch (8 sc)
2: 2 sc in each ch (16)
3: * 2 sc, sc next 1 * (24)
4: * 2 sc, sc next 2 * (32)
5: * 2 sc, sc next 3 * (40)
6: * 2 sc, sc next 3 * (50)
7: sc in each sc (50)
8: * 2 sc, sc next 4 * (60)
9: sc in each sc (60)
10: * 2 sc, sc next 5 * (70)
11: sc in each sc (70)
12: * 2 sc, sc next 4 * (84)
13: sc in each sc (84)
14: * 2 sc, sc next 3 * (105)
15: sc in each sc (105)
16: * 2 sc, sc next 4 * (126)
17: sc in each sc (126)
18: sc in each sc (126)
19: * 2 sc, sc next 5 * (147)
20-26: Repeat Row 19
27 (start decreasing): * sc 2tog, sc next 5 * (126)
28: sc in each sc (126)
29: * sc 2tog, sc next 4 * (105)
30: sc in each sc (105)
Hat band, rows 31-50: sc in each sc
Slip stitch and fasten off, leave long tail. Now fold the hat band up on itself and sew the last row to the beginning of the hat band, so that it's a double thickness of crocheted fabric. The width of the hat band is easily adjustable.

My version of the hat has a leather brim, but the original has a crocheted brim. I have not created a crochet pattern for a brim yet. My friend already had the brim, which is just a very thick piece of leather. I punched holes about 1/8" apart on the inside edge of the brim using a 1/16" leather hole punch. Then, I cut a long piece of yarn and used a lacing needle to sew the brim to the hat band. A yarn needle is too big to fit through the punched holes, but another option would be to sew the brim with narrow thread or to use a small crochet hook to pull the yarn through the holes.

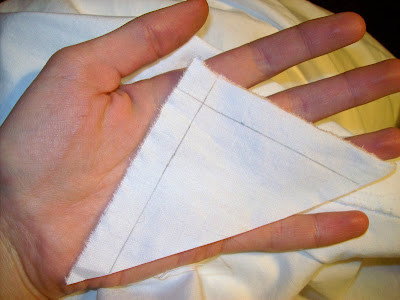
I also created a removable liner. I cut one circle of oilcloth and one of 100% cotton fabric slightly smaller than the hat. Using 100% cotton batting, I cut six more circles with a slightly smaller diameter than the fabric pieces. Next, I sewed the fabric and oilcloth together along the circumference, right sides in, leaving a small gap to turn it inside out. After pressing the edges, I inserted the six layers of cotton batting, and hand sewed the gap closed. This liner gives the cap some body and makes it warmer and more waterproof. The cap can be worn without it.

This cap was a fun experiment. I'm pleased to see that I've become good enough at crocheting to create my own patterns. I've made my own patterns before, but lacked the patience to unravel it and re-do it to get it right. This time, I patiently tried different approaches until I achieved the desired look. It was a lot of time, but not too difficult.


Specifications
Material: 100% wool yarn, 100% cotton fabric, 100% cotton batting, oilcloth, leather brim
Pattern: My own :)
Year: 1860-1865
Notions: thread for the removable liner
How historically accurate is it? It's very historically accurate as far as I know, though I think the self-closing mock ring is a modern technique. This could easily be remedied by making a ch 4, sc in 4th ch from hook. I'd say about 75% accuracy since I invented the pattern, liner, crocheted cap + leather brim combination, and method of attaching the brim, though all materials are historically accurate.
Hours to complete: ? I worked on it a few minutes at a time during free time. Since I developed the pattern as I progressed, a lot of time went into this project--maybe 20 hours. If I make it again, I could probably do it in 5 hours.
Total cost: A few U.S. dollars--I don't remember. The batting and fabric were stash. The oilcloth and leather brim were supplied by my client.


Comments
Post a Comment