A Winter Hood

 I would like to thank The Dreamstress (http://thedreamstress.com/) for creating the Historical Sew Fortnightly (http://thedreamstress.com/the-historical-sew-fortnightly/) and giving me the inspiration to contribute to my sewing blog. I've been wanting to blog about my historical sewing, but have been lazy and uninspired. However, I have plenty of sewing to feature! Since I am still getting started with this blog, I can't post a HSF project yet, but I would like to use its format to showcase something else which I just made this winter.
Winter weather inspired me to make a warm woolen hood. Bonnets and other headwear are very exciting projects; I'm just learning how to make them and I really enjoy drafting patterns and discovering what works and what doesn't. They are a great way to practice and learn new skills as they are small and therefore quick to make and can be made with small scraps of fabric. So, here is my first attempt at winter headwear--a wool and silk hood modeled after images of this hood in the collection of The Metropolitan Museum of Art.
 I also drew inspiration from my materials, and chose the fabrics based on the flowered border, which is a scrap of antique silk that I got for free at a flea market. It appeared to be a decorative pillowcase, but was extremely dirty and moldy. Since I was buying a lot of other fabric from the vendor, she gave me the silk scrap; it probably looked like an old rag to her, but to me it was treasure! It cleaned up nice, but still has some mold stains. Never fear, "it has a nice patina to it." The maroon wool and the wool interlining were both from wool skirts that I rescued from the garbage; a friend of mine was discarding them and I asked if I could take them. The green silk lining is from a silk blouse that I bought at a thrift store for $2.00. How is that for an affordable project?
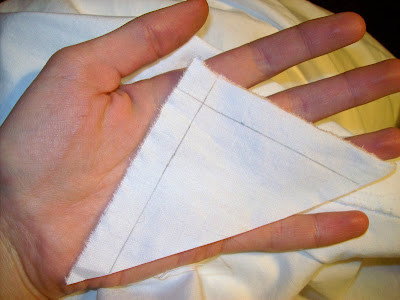
I used a sunbonnet that I had made to estimate dimensions as well as measurements of my head, then I drew the pattern pieces on a sketch pad to play around with ideas for the shapes of the pattern pieces. When I was satisfied with my sketches, I measured the pieces on fabric. I did not need to make a pattern as the pieces are simple geometric shapes. I sewed all of the inside seams on a sewing machine, and the visible stitching by hand.
 First, I basted the layers together. I gathered the crown and sewed it to the brim, with the lining and fashion fabric sewn separately so that the seam is hidden between the layers. There is a line of hand-quilting on the brim to keep the seam allowance of the crown turned toward the back so that the brim lays smoothly on my head. I checked the fit of the bonnet to make sure that the neckline fell at the right height. Ideally, it should be level with one's lower jaw. If it's too high, the curtain (and lappets in this case) will blow up into the wearer's face when there's a breeze.
 Next, I gathered the lower edge of the crown and bound the entired lower edge of the crown and brim in cotton tape to keep the raw edges covered and to hold the gathers. I used bias tape to bind the lappet edges. Then, I made the curtain. I did not interline the curtain so that it would be less bulky and would gather nicely, but I wish I had so that it would be warmer. I basted the fashion fabric to the lining, gathered the top edge to fit the bottom edge of the brim and crown, and bound all the edges in bias tape that I made from the green silk, carefully folding the corners and stitching them flat.. Then, I hand-sewed it onto the bonnet, stitching both at the top of the bias tape edge and on the inside.
Once the bonnet was assembled, I measured the width of the border and marked where it would be sewn on. Then, I hand-quilted a straight line on the front edge, going from one lappet to the other. I drew a quilting pattern free-hand with a piece of soap (it shows up really well on wool, whereas marking pencels usually do not show). To finish, I used a running stitch to attach the floral border and made green silk ties attached halfway across the bottom edge of the brim on the inside.
 I wish I had this much luck with sunbonnets--I still haven't made one with which I am satisfied. This woolen hood, however, brought me tears of joy when I first put it on and saw how lovely it turned out! Yes, I cried when I finished it. Go ahead and laugh. It's the prettiest thing I've ever made, and the only thing I've been completely happy with. There is always room for improvement, but with this project, I am not obsessing over what I wish I had done differently. I've worn it a few times; it has great insulating value and is both warm and beautiful.
The Project: Winter Hood
Fabric: wool and silk
Pattern: I drafted my own
Year: 1860's
Notions: thread
How historically accurate is it? As accurate as my knowledge allows.
Hours to complete: Perhaps 10. I don't remember and didn't track my hours.
First worn: sometime in December 2012, out hiking
Total cost: $2.00 U.S.


Szép:-)
ReplyDeleteKöszönöm!
Delete:-)
DeleteThis is really pretty! Did you hand sew the decorative stitching on the maroon? This looks like hours of work!
ReplyDeleteI've really neglected my blog and just saw your comment recently. Sorry! Yes, I hand sewed the quilting. I drew it freehand onto the fabric with a piece of soap and then stitched on those lines. It didn't take very long. Thank you, Linda!
ReplyDelete