The $500 Pair of Slippers
A few weeks ago, I noticed my dad walking around in his very ratty slippers.
"I think it's time for you to throw those out, Dad," I said. "What are you waiting for, Christmas?"
"Yes," he replied, "Maybe you could make me some!" He even wrapped the toe of a slipper in packaging tape to accentuate the fact that it was falling apart. It was amusing.
I scoffed at the idea, but then started looking for inspiration. I couldn't find any good free patterns, so I decided to try to develop my own crochet pattern for slippers. I am not very skilled at crocheting, but I understand it and don't find it too challenging. I started by crocheting a sole, which I ripped apart and re-started so many times that my mother thought I should throw in the towel. That only made me more determined to succeed. Mom dubbed them the $500 slippers because of how much time I spent working on them. I didn't enjoy the project very much, but I wanted to see if I could do it.

I managed to finish these slippers in time for Christmas. They look really nice, but are not the best option for durability and comfort. I'm adding the pattern to this blog post mostly to show how I made these slippers, but if anyone feels compelled to use it, you are welcome. Be prepared to make lots of changes if you want a good finished product. Also, this is the first crochet pattern I've ever written, so it's not quite up to standard.

I sewed a cotton fabric lining onto the underside of the slipper tops to keep them from stretching and to make them thicker and sturdier. To attach the top to the sole, I sewed the top and the sole together using a buttonhole stitch, but they could also be crocheted together as a continuation of crocheting the top. Instead of fastening off after Row 9 of the top, one could hold the pieces together and crochet through the edges of both pieces and then fasten off. I also added a little bit of decoration by crocheting on a blue strap and bow and using the blue yarn to sew the pieces together. Plus, I used the blue yarn as a row of single crochet between rows 7 and 8 of the top of the slipper, something that I did not write into this pattern because it made extra loose ends. I think this element would be better if sewn or woven into the crocheting.
"I think it's time for you to throw those out, Dad," I said. "What are you waiting for, Christmas?"
"Yes," he replied, "Maybe you could make me some!" He even wrapped the toe of a slipper in packaging tape to accentuate the fact that it was falling apart. It was amusing.
I scoffed at the idea, but then started looking for inspiration. I couldn't find any good free patterns, so I decided to try to develop my own crochet pattern for slippers. I am not very skilled at crocheting, but I understand it and don't find it too challenging. I started by crocheting a sole, which I ripped apart and re-started so many times that my mother thought I should throw in the towel. That only made me more determined to succeed. Mom dubbed them the $500 slippers because of how much time I spent working on them. I didn't enjoy the project very much, but I wanted to see if I could do it.

I managed to finish these slippers in time for Christmas. They look really nice, but are not the best option for durability and comfort. I'm adding the pattern to this blog post mostly to show how I made these slippers, but if anyone feels compelled to use it, you are welcome. Be prepared to make lots of changes if you want a good finished product. Also, this is the first crochet pattern I've ever written, so it's not quite up to standard.
These slippers fit U.S. men’s size 11 feet. I used sport weight yarn
for the soles of the slippers and worsted weight for the tops, simply because
those were what I had. Since I used the same hook size for the entire project,
I think the pattern could be easily adapted for different types of yarn. I used a hook size G6/4.00 mm.
Sole (make four)
Row 1: ch 41, sc in 2nd ch from hook, sc in each ch after
that, 3 sc in first ch made, sc in each ch on other side of ch, 3 sc in end, sl
to 1st ch, DNT
Row 2: sc all around with an increase at each end of (2 sc in next sc) ×
3
Row 3: sc all around
Row 4: sc all around with an increase at each end of (2 sc in next sc) ×
6
Row 5: sc all around
Repeat Rows 4 and 5 once to make Rows 6 and 7
Row 8: sc all around with an increase at each end of (2 sc in next sc,
1 sc in next sc) × 6
Row 9: sc all around
Repeat Rows 8 and 9 twice to make Rows 10, 11, 12, and 13
Fasten off
I crocheted four sole pieces, then cut four similar shapes out of
fleece. I made two sandwiches of crocheted sole, two
fleece soles, crocheted sole; then single crocheted all around the edges to
hold them together. Next, I cut out two slightly smaller soles of leather,
punched holes around the edges with a hammer and nail, and sewed one to each
crocheted sole. These leather soles are important to keep the wearer from slipping--a yarn-only sole is slippery. The leather
also protects the less durable yarn sole from wearing out.
Top
Row 1: ch 18, sc in 2nd ch from hook, sc in each ch after
that, 3 sc in first ch made, sc in each ch on other side of ch, ch 2, turn
Row 2: dc all around with increase at end of (2 dc in next sc) × 3; ch
2 and turn at end of row
Row 3: repeat Row 2
Row 4: dc all around with increase at end of (2 dc in next dc, 1 dc in
next dc) × 3, ch 2 and turn at end of row
Rows 5, 6, and 7: dc all around with increase at end of (2 dc in next
dc, 1 dc in next dc) × 5, ch 2 and turn at end of row
Rows 8 and 9 (sides between the top and the sole): dc all around, ch 2
and turn at end of row
Row 10: sc along straight side to cover up the irregular edges
Fasten off

I sewed a cotton fabric lining onto the underside of the slipper tops to keep them from stretching and to make them thicker and sturdier. To attach the top to the sole, I sewed the top and the sole together using a buttonhole stitch, but they could also be crocheted together as a continuation of crocheting the top. Instead of fastening off after Row 9 of the top, one could hold the pieces together and crochet through the edges of both pieces and then fasten off. I also added a little bit of decoration by crocheting on a blue strap and bow and using the blue yarn to sew the pieces together. Plus, I used the blue yarn as a row of single crochet between rows 7 and 8 of the top of the slipper, something that I did not write into this pattern because it made extra loose ends. I think this element would be better if sewn or woven into the crocheting.
This written pattern is not exactly what I made because of some minor
improvements I wrote down, but it’s pretty similar. I think that the pattern
needs some more changes to improve the look and function of the slippers. First,
I would make the tops longer so that they would go back further on the top of
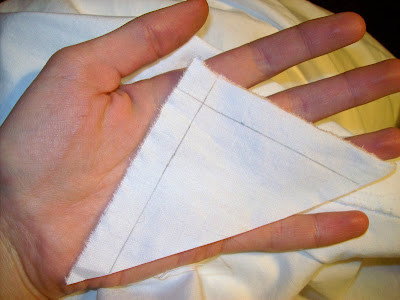
the foot and would stay on better. It would also be nice to extend the sides, like
so:


Then the tops would fit further back along the sides of the foot to
keep the slippers in place better. Furthermore, I would forego Row 9 on the
slipper tops, or even both Rows 8 and 9, because the crocheting is so stretchy
that the tops are being pushed forward and turning into an extension of the
soles. It might also be good to make the tops out of two layers of single
crochet so that they’re sturdier and would stretch less. Finally, I would find
something rigid to add to the inner layers of the soles, perhaps some kind of
plastic or rubber, so that the soles wouldn’t flop around. I'd like to try the kind of rubber soles to which one can attach the yarn.
I hope you have enjoyed reading about my project and are inspired to make a pair of slippers!

I hope you have enjoyed reading about my project and are inspired to make a pair of slippers!


Did your dad like them?
ReplyDeleteYes, he did! But, the slippers aren't sturdy enough for everyday wear, so he doesn't wear them often. That's okay, because I learned something from making them, and I think I would be able to make better ones now. Thanks for reading! It's so exciting to share what I've made.
Delete