A Man's Coat

Back in the winter, I made this18th century coat. I think I finished it in February or March. A friend of mine had started the coat years ago in a workshop. It was draped specifically for him. He had cut it out and started sewing it, then set it aside for a while. He needed it for a recent event and asked me if I could finish sewing it for him. It is completely hand sewn--a first for me! I used linen and silk sewing thread and silk buttonhole twist. I don't remember how long it took me to make it; maybe around 20 hours. I actually enjoyed the hand sewing, though I certainly need to get faster at it.


I had some really great pictures of this coat being modeled by my dress form, but then my USB quit working and I lost years of photos D': (sobbing emoticon). It's time to quit being a Luddite and embrace online photo storage.

Deciding where to place the pocket flaps

The cats were jealous that I was spending excessive time petting an inanimate hunk of wool
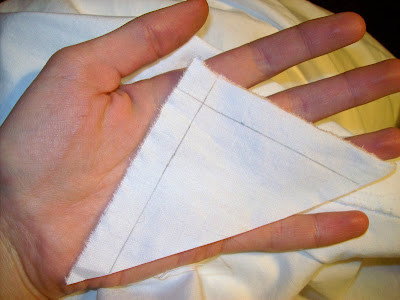
The coat is completely hand stitched and unlined. Since the wool fabric is coat weight and doesn't fray much, I didn't fell the seams; rather, I back stitched and then pressed the seams open. For the facings, I pinned the fabric wrong side to wrong side and prick stitched from the front--no need to sew inside out and turn. I lined the cuffs with plain unbleached linen and turned the linen fabric under before prick stitching it to the cuffs. Then I back stitched the linen lining to the ends of the sleeves and turned the wool outer cuff to the inside of the sleeves and whip stitched them. I had pictures, but those are lost forever :'( I also lined the pocket flaps with unbleached linen, which you can see in one of these pictures.

Pewter buttons

The collar was too tall, so I trimmed some off of the top, folded the outside over, and whip stitched it.

These are the pleats in the tails/side vents.

My buttonholes are improving. First, I basted stiff interfacing to the front edges of the coat. Then, I cut the holes with a chisel through only two layers, the outer fabric and the interlining. Next, I sewed the buttonhole purl stitch over gimp.  After that, I attached an inner lining of the brown wool using a prick stitch and cut buttonholes through that layer, which I then attached to the front buttonholes using a whip stitch. 


I'm not sure about the accuracy and quality of my work. I referred to images on the 18th Century Material Culture Resource Center (https://www.scribd.com/document/240864437/Male-Dress-Coats-Suits) and "Costume Close-Up: Clothing Construction and Pattern, 1750-1790" by Linda Baumgarten regarding the shapes of the pattern pieces,  placement of cuffs, how to pleat the tails, etc. I also got advice from various knowledgeable people, especially my local history museum's program coordinator (http://www.heinzhistorycenter.org/blog/author/justinmeinert). 

While this project has been completed and in the hands of its owner for half a year already, I'm glad I finally blogged about it. Sorry I don't have better photos!

Comments

  1. Kaela.. You are amazing.. I loved this. As you know I love hand stitching .but certainly too hot this summer to quilt.. I should learn to tat so I can carry it.. Maybe some lessons someday... Hard to find good wool miss your smile barb

    ReplyDelete
  2. I need you to teach me how to do buttonholes! They are simply awesome!!!

    ReplyDelete
    Replies
    1. Thank you! If you live anywhere near Pittsburgh or Buffalo, I could teach you!

      Delete

Post a Comment

Popular posts from this blog

18th century Garsault shirt

18th Century Hunting Shirt

Schuylkill Arsenal Infantry Jacket